Depth of Field (dof) for adobe molehill.
Right I have tried a few ways to do this each with its advantaged and disadvantages, so what I will do is run you through how I approached this and how to implement it (leaving some bits down to you).
So what is depth of field?
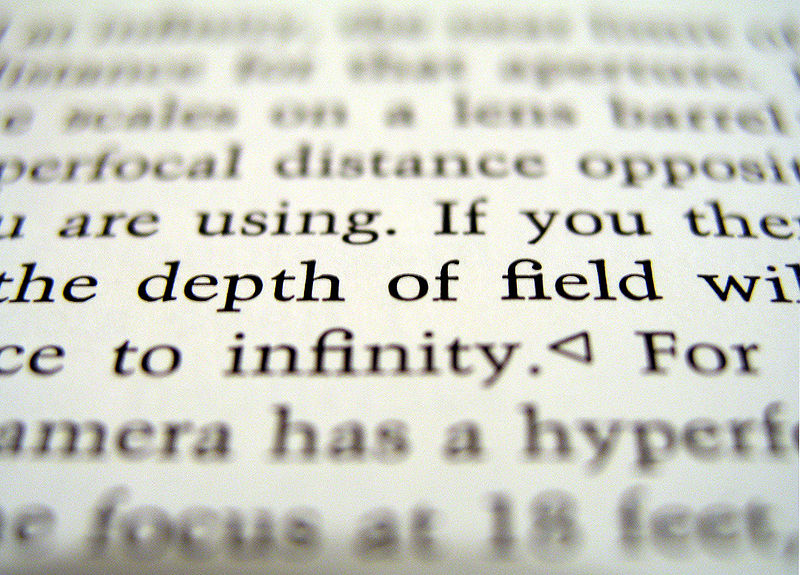
Depth of field is an effect whereby object viewed at a particular focal distance (distance from camera) are sharper and those that are further from this point look blurrier.


(images from wikipedia)
What we want to do is emulate this effect in our 3d environment (molehill woo)!
To do this we need to consider a couple of things, the effect will be applied as a post process which requires additional depth information and a way to blur stuff.
Post processing:
These are effects applied to a scene AFTER it has already been rendered, and is achieved by doing the following.
Rendering to a texture instead of the backbuffer.
Performing some kind of effect (the post process) using the scene texture as an input and then outputting the result.
This resultant texture is then used to colour a screen aligned quad (pretty easy to set up) and then this is rendered to the back buffer.
Depth information:
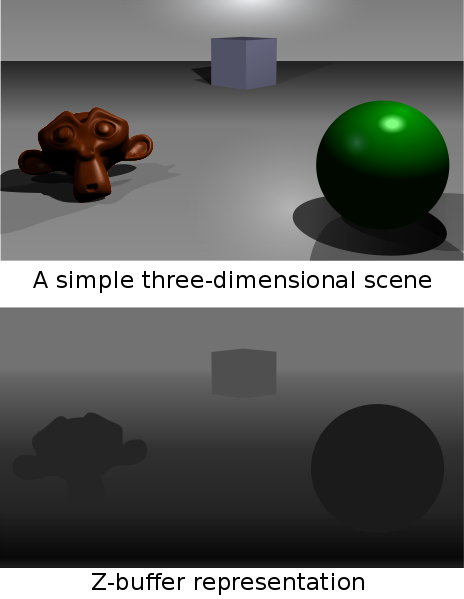
This is information that describes the depth of each pixel relative to the camera from 0-1 (black to white) based on the near and far planes.
Normally one has access to the depth buffer, sadly we do not, happily we can make one 🙂
All you got to do is render you whole scene again to a new texture with one depth material for every object. (this is a pretty fast process as the depth material has a pretty simple shaders and there is no program swapping between models as they all share)
I will probably not describe how to produce one of these in this article.

(thanks again wikipedia)
Blur:
To simulate being out of focus we can use a blur, this is a large area in graphics and there are at least 6 zillion ways to do it. I will share a couple and you can decide what you want to use.
1. render the texture again to another target but this time use a smaller one (maybe 1/16th the size) then when this is stretched back up it will be blurred.
2. some kind of of simple fast blur in the pixel shader (i.e. for each pixel sample 8 pixels around it and take an average)
3. gaussian blur, more complex and slower but produces nice results, must be rendered a few times (x, then y and maybe repeat)
Now we should have ourselves 2 or 3 textures, one scene render, one depth render and maybe a blur texture… now what?
Here is the fun part
we take our textures in as parameters to our DOF post process then use a sprinkling of magic to get the result we want.
the magic:
use the depth information compared against the focal point to determine a blur factor.
this factor can be used in two ways depending on your approach.
a. use the factor as an interpolation ratio to lerp (interpolate) between the original and the blurred texture
b. use the factor to determine the blur amount in your blur pass.
its that simple 🙂
(the tough bit is setting up the textures correctly and the blur shaders can get complex)
so when you run this shader you end up with a nice sharp areas (those near the focal point) and more blur as objects get further away from this point.
there is however much more to consider, like bleeding of blurred areas into areas that should be sharp which can be fixed but it involves sampling the depth buffer a lot more to ensure that blur samples are only taken from pixels that are a similar detph.
also worth considering the “factor” mentioned before and how it can be used to produce smoother falloff and falloff that scales nicely.
see this image:

Right I have run out of time, but if you want anything else or don’t understand any of my ramblings let me know and I will try and acomodate.
(live demos to follow when I get some time)


